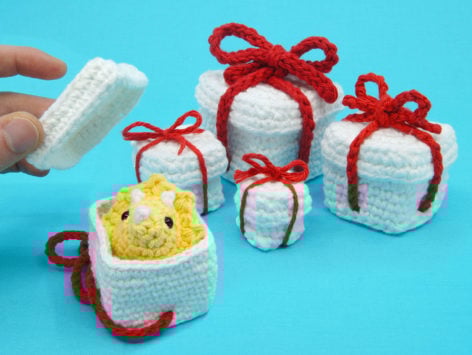
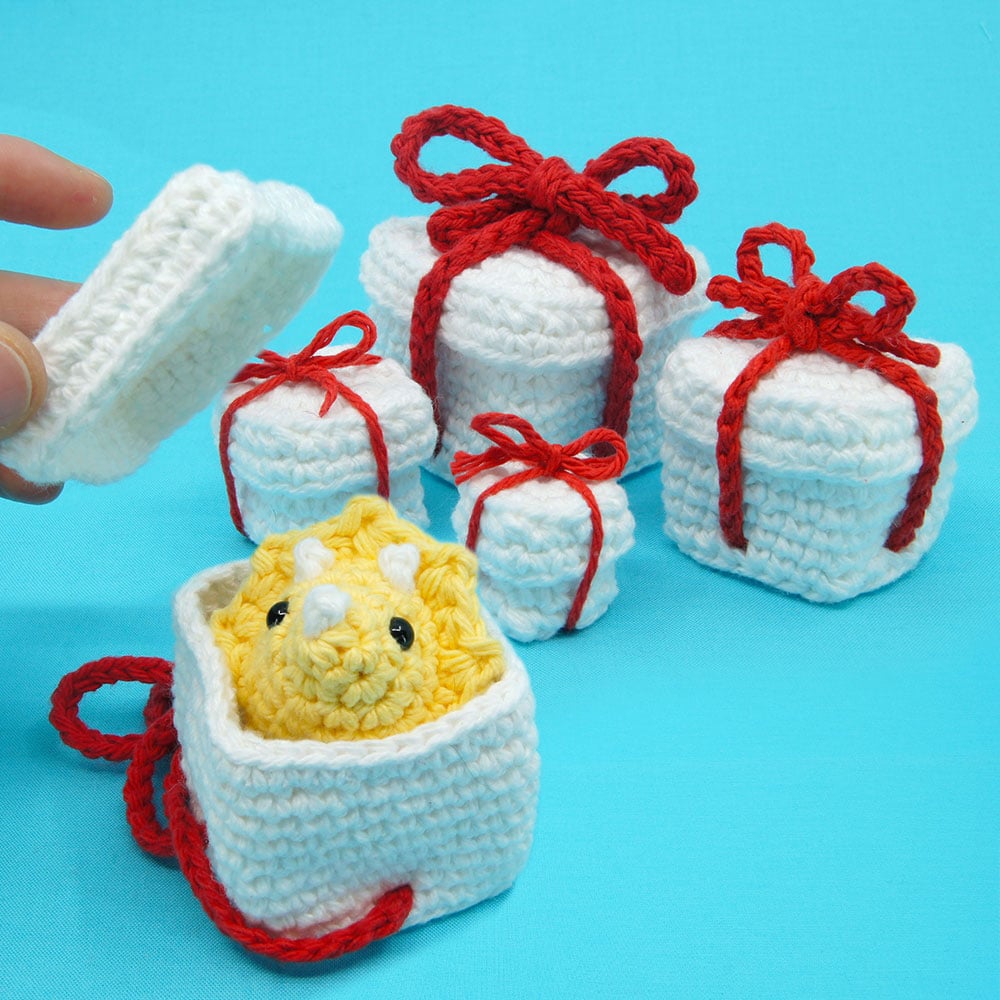
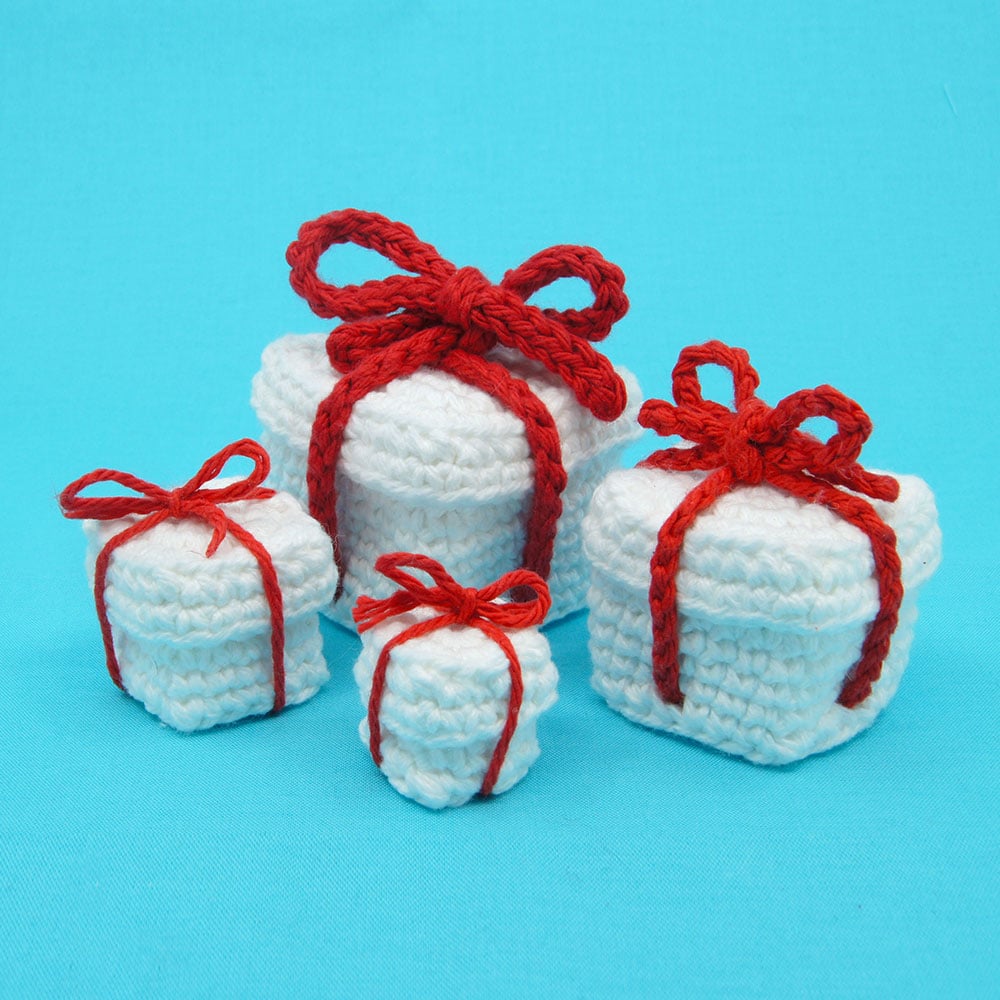
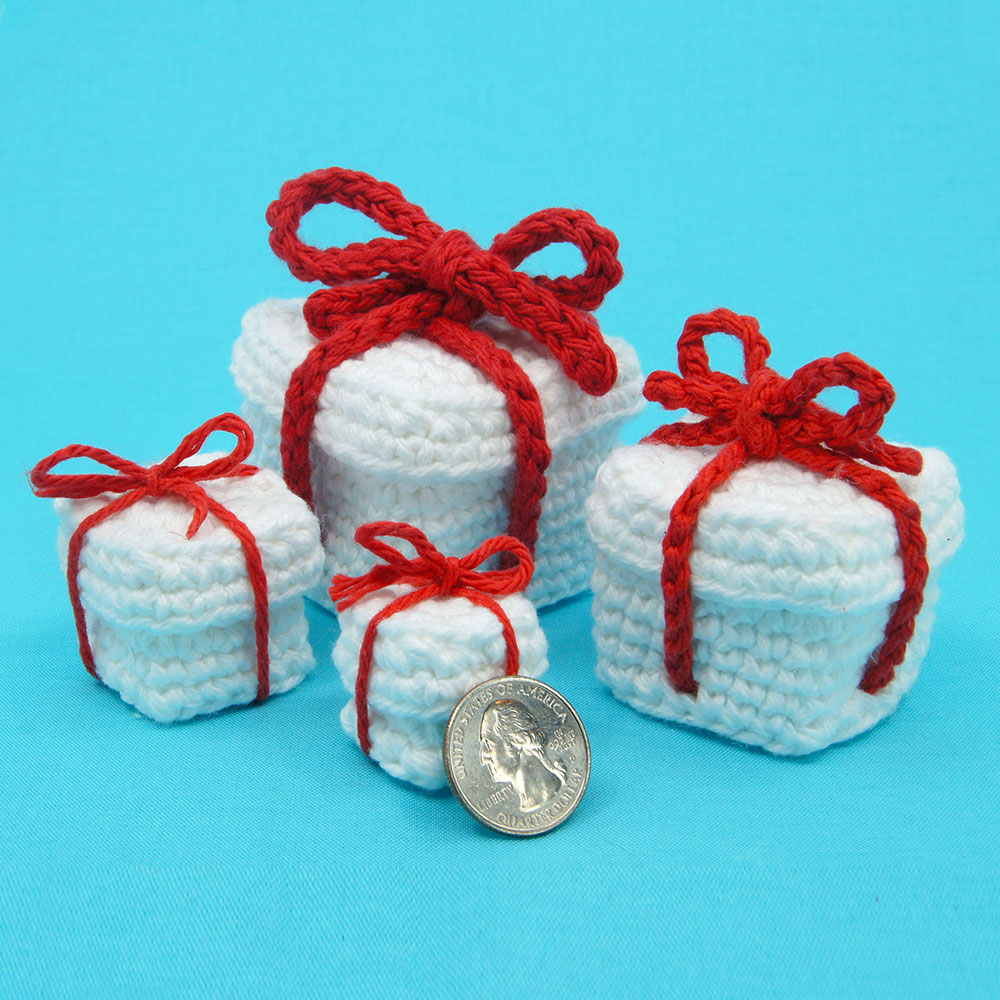
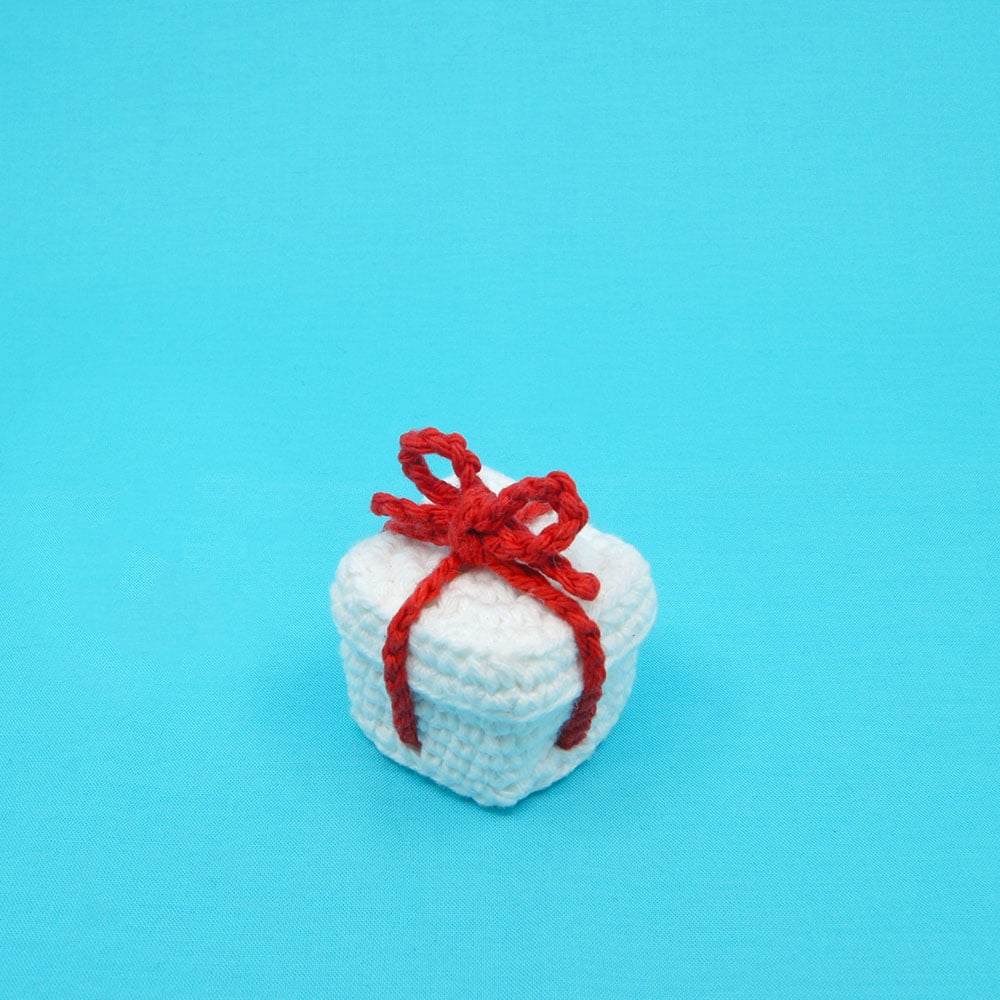
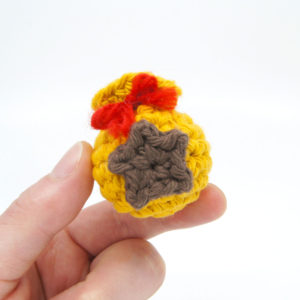
Present Gift Box

Louie's Loops

Medium
What you'll create


What you'll learn
What you'll need
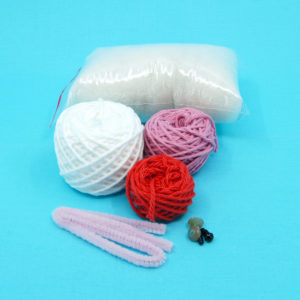
Cotton Yarn
Weight

Colors

Crochet Hook
G6 / 4.00 mm

Stuffing

Darning Needle
Abbreviations
ch
Chain Stitch
st
Stitch
slst
Slip Stitch
sc
Single Crochet
inc
Increase
dec
Decrease (Sharp)
FLO/BLO
Front / Back Loops Only
Other Useful Info
Gauge
5 Rnds and 4 sts per 1”
Finished piece is about 3” tall
Worked
In the Round unless otherwise stated
Note
This pattern has a few tricky parts and I suggest starting with a medium box using the video tutorial above for beginner crocheters.

The Pattern
 Use the checkboxes to track your progress
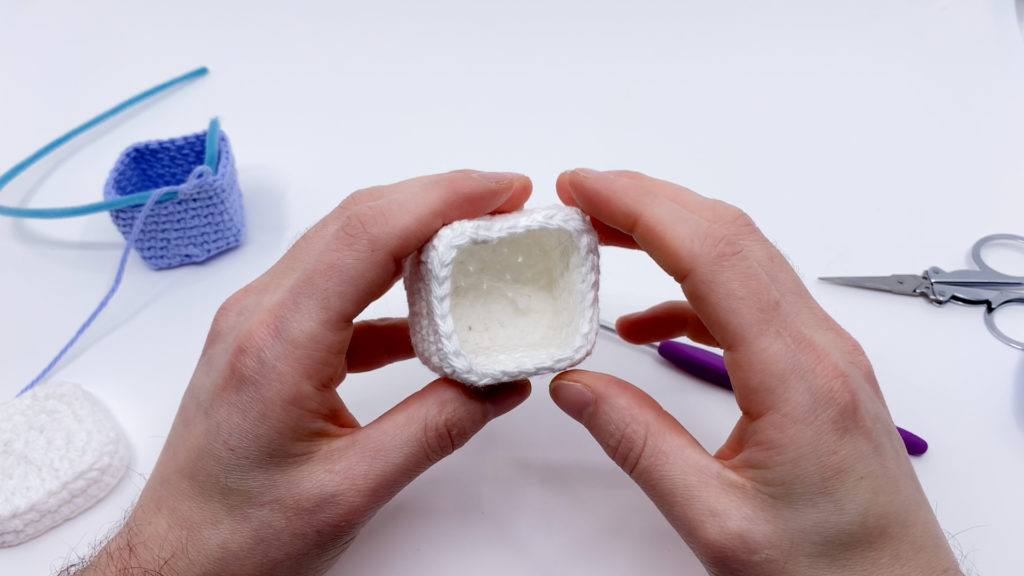
01Small Box
Lid
Magic loop
Rnd 1: sc 8 in the magic loop (8)
Rnd 2: inc in each st (16)
Rnd 3: [sc 1, inc 1, ch 1, inc 1, sc 1] 4 times (24 +4chs)
Rnd 4: slst 1, ch 2, starting in the same st, working into the BLO and into the loop on the back of the previous Rnd, sc in each st skipping the chs (24)
Rnd 5: skip the slst and chs, sc in each st (24)
Slst 1, cut the yarn and pull through. Hide the end.
Box
Magic loop
Rnd 1: sc 8 in the magic loop (8)
Rnd 2: inc in each st (16)
{ } = Worked into the same stitch
Rnd 3: [sc 2, {sc 1, ch 1, sc 1}, sc 1] 4 times (20 +4 chs)
Rnd 4: slst 1, ch 2, starting in the same st, working into the BLO and into the loop on the back of the previous Rnd, sc in each st skipping the chs (20)
Rnds 5+: sc in each st (20 x ?)
Repeat this round until you have a length you’re happy with. 4 rounds should make a cube.
For added stability to the lip of the box, work the final Rnd of sc sts around a pipecleaner and trim the edges of the pipe cleaner. This can be used to mold the lip to maintain a square shape and should be used for very tall boxes. I find this is unnecessary for square boxes.
To finish, slst 1, cut the yarn, pull through, and hide the end.
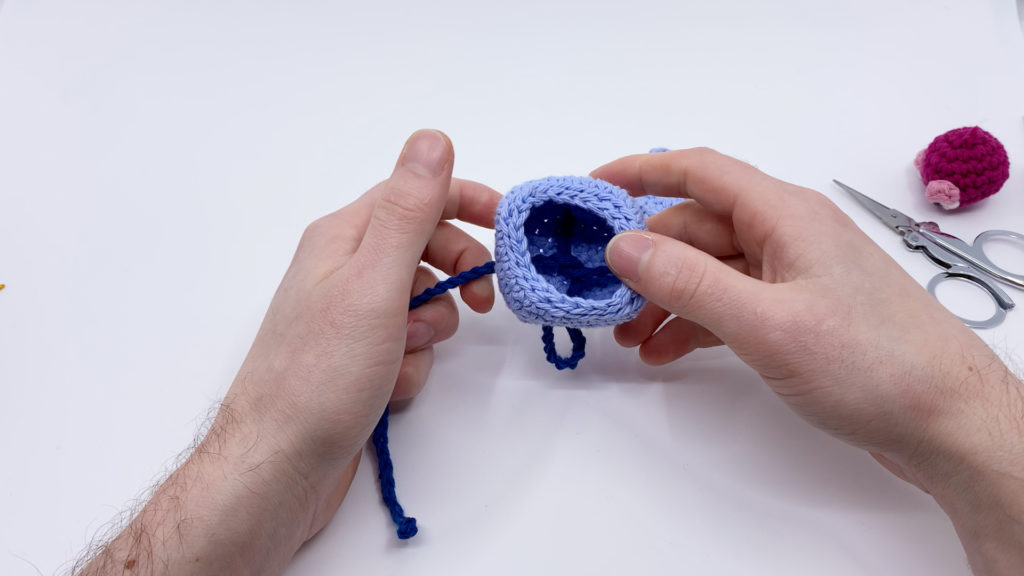
02Making Sharper Angles
I have found this technique especially useful for making a sharper, more pronounced edge to my boxes, but it is a little tricky, and optional!
In the rounds following your final Rnds of increasing on the Lid or Boxes, work into the BLO (back loops only) and into the loop on the back of the previous round.
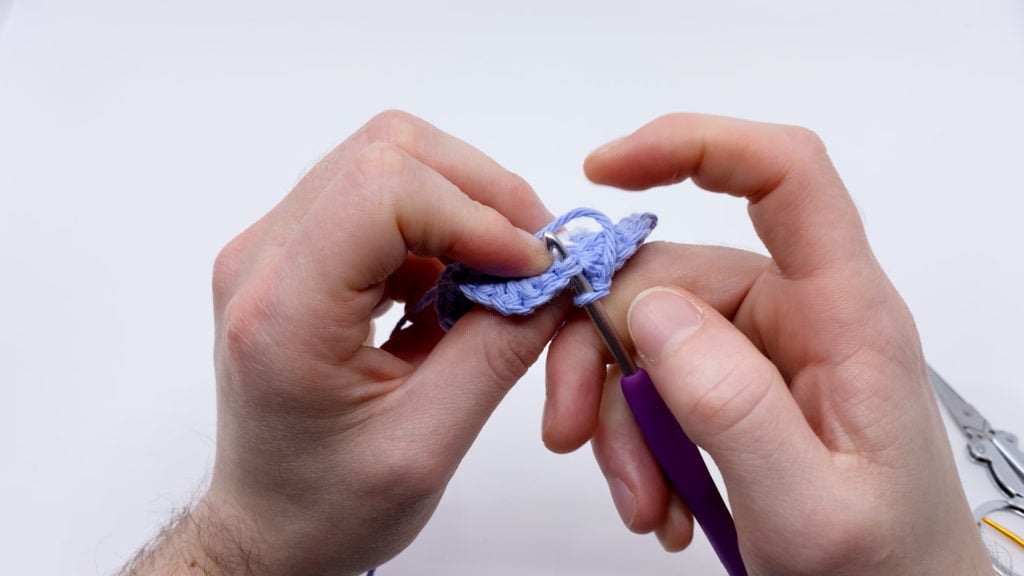
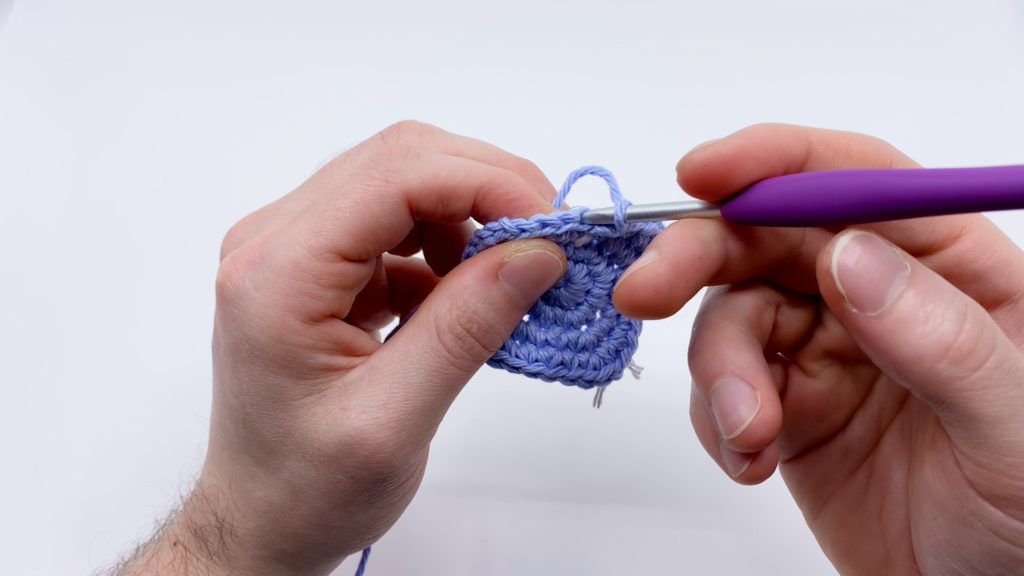
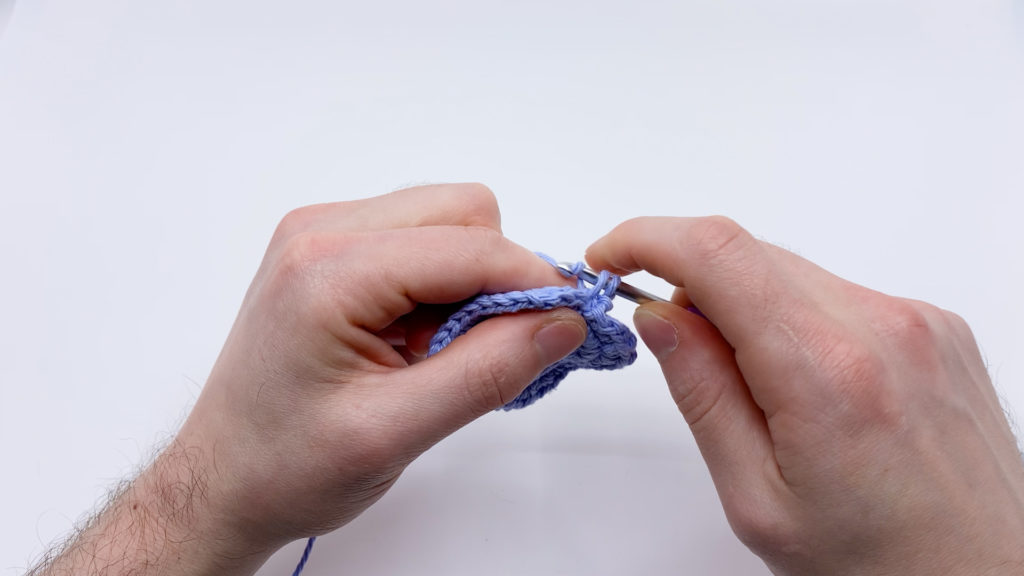
I find it’s easiest to do this by using your nail of your dominant index finger to help pry your crochet hook into both the back loop and loop on the back of the previous round simultaneously.
Do not forget to work into the same stitch that you slip stitched into to start this Round (unless you’re adding holes to the base of your box). It’s easy to miss this stitch and if you do, you will be short a stitch by the end of the round.

Take it slowly, one stitch at a time, and remember if you’re having a lot of trouble, this is optional and your box will still look good without this technique by just working into the BLO.
03Medium Box
Lid
Magic Loop
Rnd 1: sc 8 in the magic loop (8)
Rnd 2: inc in each st (16)
Rnd 3: [sc 1, inc 2, sc 1] 4 times (24)
Rnd 4: [sc 2, inc 1, ch 1, inc 1, sc 2] 4 times (32 +4chs)
Rnd 5: slst 1, ch 2, starting in the same st, working into the BLO and into the loop on the back of the previous Rnd, sc in each st skipping the chs (32)
Rnd 6: skip the slst and chs, sc in each st (32)
Slst 1, cut the yarn and pull through. Hide the end.
Box
Magic loop
Rnd 1: sc 8 in the magic loop (8)
Rnd 2: inc in each st (16)
Rnd 3: [sc 1, inc 2, sc 1] 4 times (24)
{ } = Worked into the same stitch
Rnd 4: [sc 3, {sc 1, ch 1, sc 1}, sc 2] 4 times (28 +4 chs)
To add holes to hide the ribbon replace Rnd 5A with Rnd 5B.
Rnd 5A: slst 1, ch 2, starting in the same st, working into the BLO and into the loop on the back of the previous Rnd, sc in each st skipping the chs (28)

Rnd 5B: slst 1, ch 3, skip the first st (the same st you just worked into), working into the BLO and into the loop on the back of the previous Rnd, skipping the chs from the previous Rnd, sc 6, [ch 2, skip a st, sc 6] 3 times (24 + 4 ch spaces)
If you made Rnd 5B for the added holes, work in each ch space as a single stitch in round 6.
Rnds 6+: sc in each st (28 x ?)
Repeat this round until you have a length you’re happy with. 6 rounds should make a cube.
For added stability to the lip of the box, work the final Rnd of sc sts around a pipe cleaner and trim the edges of the pipe cleaner prior to Rnd N below. This can be used to mold the lip to maintain a square shape and should be used for very tall boxes. I find this is unnecessary for cube boxes.

Pinch edges of your box to form the edges of the box, this will help in the next Rnd. Continue to Rnd N to finish.
Rnd N is optional, but useful if you have a somewhat loose gauge.
Rnd N: working into the BLO, slst until you get to a corner, this depends on how many repeats you made, (for a cube, slst 4 to reach the first corner), dec 1, [slst 5, dec 1] 3 times, slst until you reach the beginning of the Rnd (24)
Cut the yarn, pull through and hide the end.

04Large Box
Lid
Magic loop
Rnd 1: sc 8 in the magic loop (8)
Rnd 2: inc in each st (16)
Rnd 3: [sc 1, inc 2, sc 1] 4 times (24)
Rnd 4: [sc 2, inc 2, sc 2] 4 times (32)
Rnd 5: [sc 3, inc 1, ch 1, inc 1, sc 3] 4 times (40 +4 chs)
Rnd 6: slst 1, ch 2, starting in the same st, working into the BLO and into the loop on the back of the previous Rnd, sc in each st skipping the chs (40)
Rnd 7: skip the slst and chs, sc in each st (40)
Slst 1, cut the yarn and pull through. Hide the end.
Box
Magic loop
Rnd 1: sc 8 in the magic loop (8)
Rnd 2: inc in each st (16)
Rnd 3: [sc 1, inc 2, sc 1] 4 times (24)
Rnd 4: [sc 2, inc 2, sc 2] 4 times (32)
{ } = Worked into the same stitch
Rnd 5: [sc 4, {sc 1, ch 1, sc 1}, sc 3] 4 times (36 +4 chs)
To add holes to hide the ribbon, replace Rnd 6A with Rnd 6B.
Rnd 6A: slst 1, ch 2, starting in the same st, working into the BLO and into the loop on the back of the previous Rnd, sc in each st skipping the chs (36)
Rnd 6B: slst 1, ch 3, skip the first st (the same st you just worked into), working into the BLO and into the loop on the back of the previous Rnd, skipping the chs from the previous Rnd, sc 8, [ch 2, skip a st, sc 8] 3 times (32 + 4 ch spaces)
If you made Rnd 6B for the added holes, work in each ch space as a single stitch in Rnd 7.
Rnds 7+: sc in each st (36 x ?)
Repeat this round until you have a length you’re happy with. I like doing 8 rounds for a cube.
For added stability to the lip of the box, work the final Rnd of sc sts around a pipecleaner and trim the edges of the pipe cleaner prior to Rnd N below. This can be used to mold the lip to maintain a square shape and should be used for very tall boxes. I find this is unnecessary for cube boxes.
Pinch edges of your box to form the edges of the box, this will help in the next Rnd. Continue to Rnd N to finish.
Rnd N optional, but useful if you have a somewhat loose gauge.
Rnd N: working into the BLO, slst until you get to a corner, this depends on how many repeats you made, (for a cube, slst 5 to reach the first corner), dec 1, [slst 7, dec 1] 3 times, slst until you reach the beginning of the Rnd (32)
05Ribbon String
You can make your ribbon 3 levels of thickness.
Firstly try using just a simple string. This is best for a small and mini sized box, but regardless you should try this first as it will give you an estimate of how long to make your ribbon.
To tie your ribbon, place your string over the top of the box with the lid on, go around the outside to the underside of your box.
Then twist with the opposite side of the string and go back up the box on the unused sides to meet back together at the top. Tie a simple knot as if you were tying you shoes, and cut the ends to size it correctly.
If you would like to make a thicker ribbon, untie this. You will use this to measure how long to make your ribbon.
Now to make a thicker ribbon, using a new strand of yarn, chain as many times as you need to match the length of your original string.
If you would like to make a thicker ribbon, untie this. You will use this to measure how long to make your ribbon.
Now to make a thicker ribbon, using a new strand of yarn, chain as many times as you need to match the length of your original string.
To make an even thicker ribbon, turn, skip the first ch, and slst in each ch to the end. Cut the yarn and hide the ends.
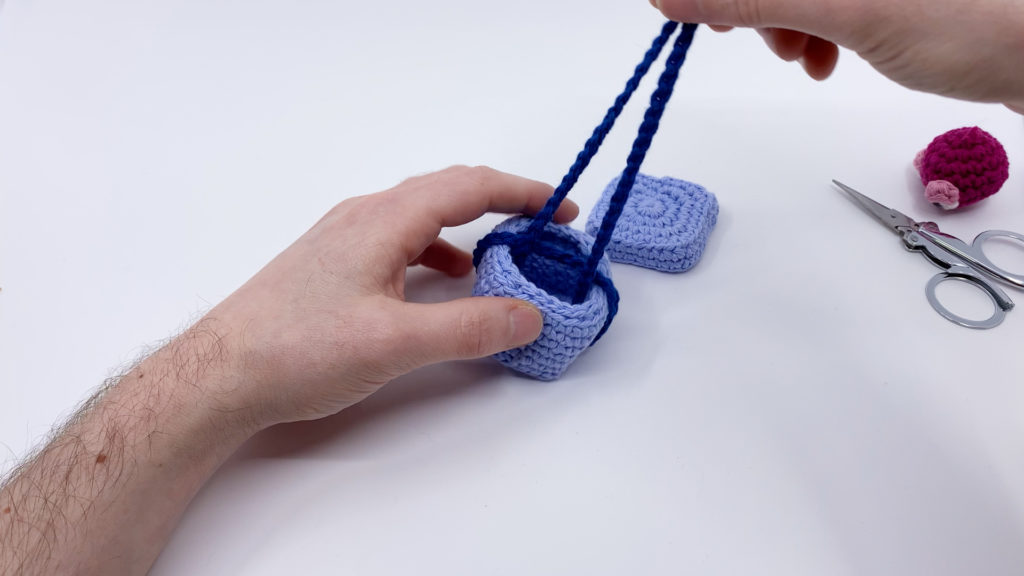
To tie your ribbon using the holes, to hide it on the inside, go around the outside of the box over the top, and enter into 2 holes on opposite sides. Pull this so that each end is equally long, leave just enough room to fit your lit under.
Twist on the inside and exit the box out of the unused holes. Travel back up the box to the top.
Fit your lid back onto the box under the loop with whatever you want inside, pull the ends tight to pull the loop down onto the lid. Tie the ends together on the top using a simple knot!
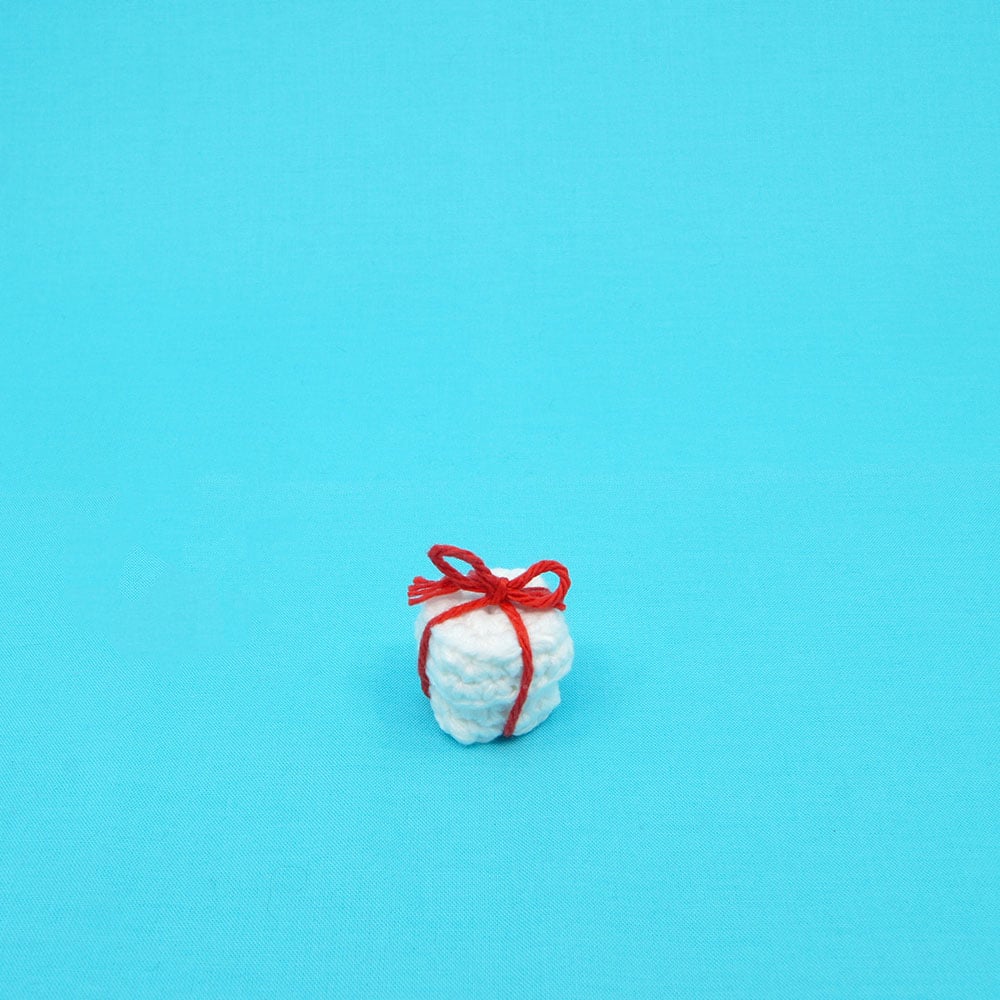
06Mini Box
Lid
Magic loop
Rnd 1: sc 8 in the magic loop (8)
Rnd 2: [inc 1, ch 1, inc 1] repeat 4 times (16 +4 chs)
Rnd 3: slst 1, ch 2, starting in the same st, working into the BLO and into the loop on the back of the previous Rnd, sc in each st skipping the chs (16)
Rnd 4: skip the slst and chs, sc in each st (16)
Slst 1, cut the yarn and pull through. Hide the end.
Box
Magic loop
Rnd 1: sc 8 in the magic loop (8)
{} = Worked into the same stitch
Rnd 2: [sc 1, {sc 1, ch 1, sc 1}] 4 times (12 +4 chs)
Rnd 3: slst 1, ch 2, starting in the same st, working into the BLO and into the loop on the back of the previous Rnd, sc in each st skipping the chs (12)
Rnds 4+: sc in each st (12 x ?)
Repeat this round until you have a length you’re happy with. 3 rounds should make a cube.
To finish, slst 1, cut the yarn, pull through, and hide the end.
Other Patterns You Might Like


i love your energy and have been watching you for a long time i was lost in waress for a long time, i lost my son 50 years old and just this week my kitty -i am 82 and back to stay just deciding what way i want to go. HAPPY HOLIDAYS. no need to respond life is what it is- if you know the way to go share it with others, in the 60s the hippes use to say KISS keeo it simple stupid. love jeacquie.
i login 5 times for large box pattern and i dont know its not showing ?
Tina! I would make the medium size for that I think. Maybe using some cardboard you can effect the lid’s edges a bit easier.
Hallo Louie
what size would you choose to make – if you have crocheted that heart (human heart) and want to put it in a package?
can you pack the lid – ie the edges in another way?
I still can’t get the mini box. Nothing comes up. I thought I could figure it out myself mathematically but I don’t have close to your talent , with my numbers it came up as a strange little ball/cube/?? .. lol..
The mini one is really tricky just because of the size. Maybe try it with larger or more loose yarn? Like wool?