Chapter 3: The Single Crochet

Louie's Loops

Beginner
What you'll learn
What you'll need

Cotton Yarn
Weight

Colors

Crochet Hook
G6 / 4.00 mm
Abbreviations
ch
Chain Stitch
st
Stitch
sc
Single Crochet
yo
Yarn Over

The Pattern
 Use the checkboxes to track your progress
01The Single Crochet
Okay, so to start, you’re going to be making your single crochet’s by working into the loops in a chain stitch.
We want to start kinda small; we’re only make a little square that’s 8 stitches (or single crochets) in a row, so chain 9 stitches. You will always will need one more chain than the number of stitches you plan on putting in the row to make it go up evenly for single crochet stitches. This will make sense in a second I swear… just make a chain of 9 stitches.
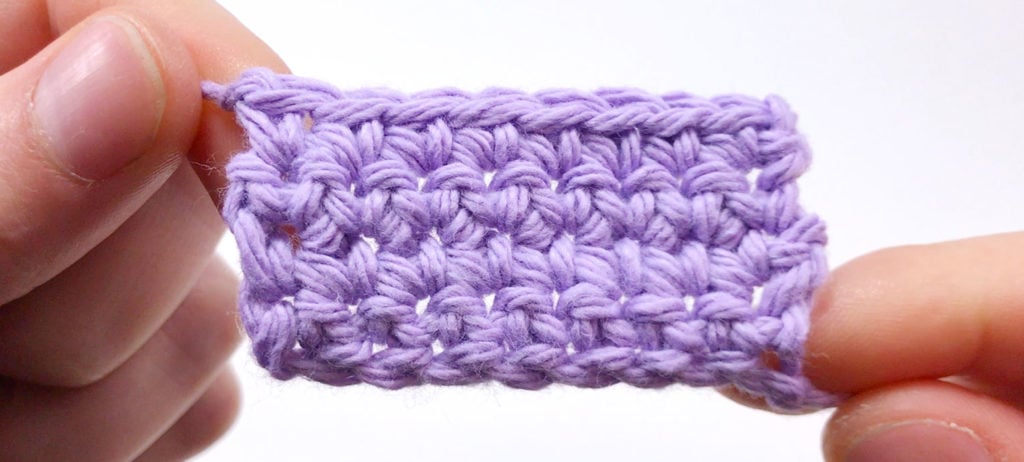
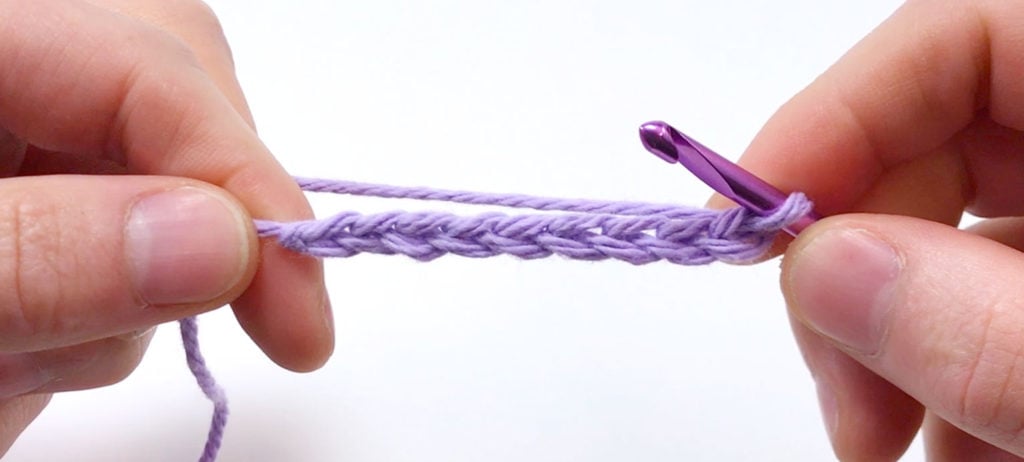
Chain 9
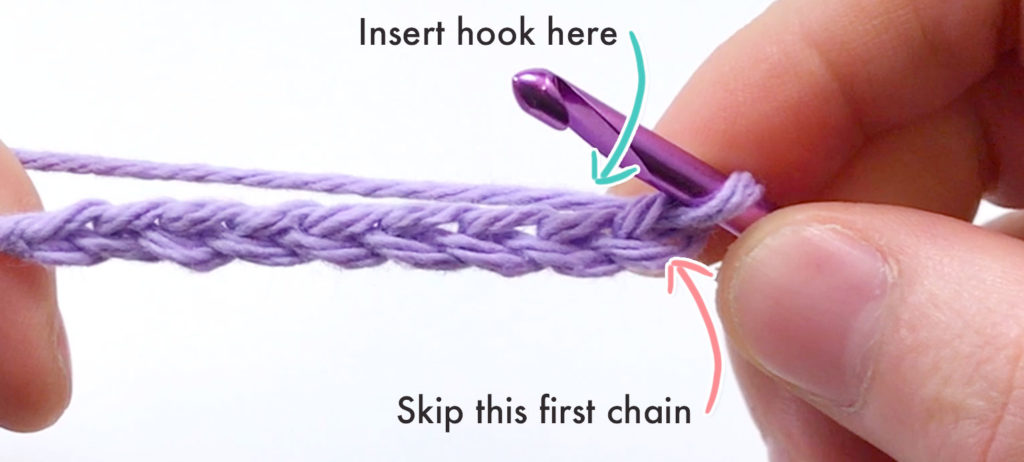
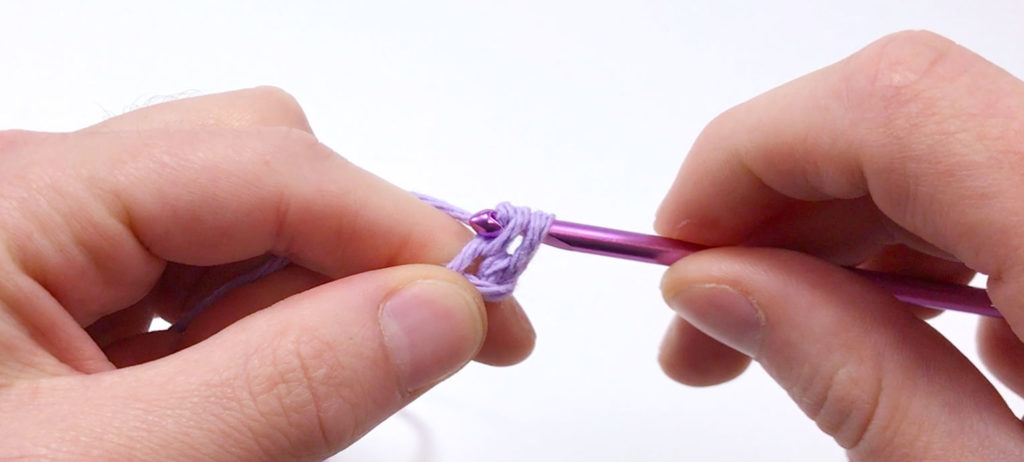
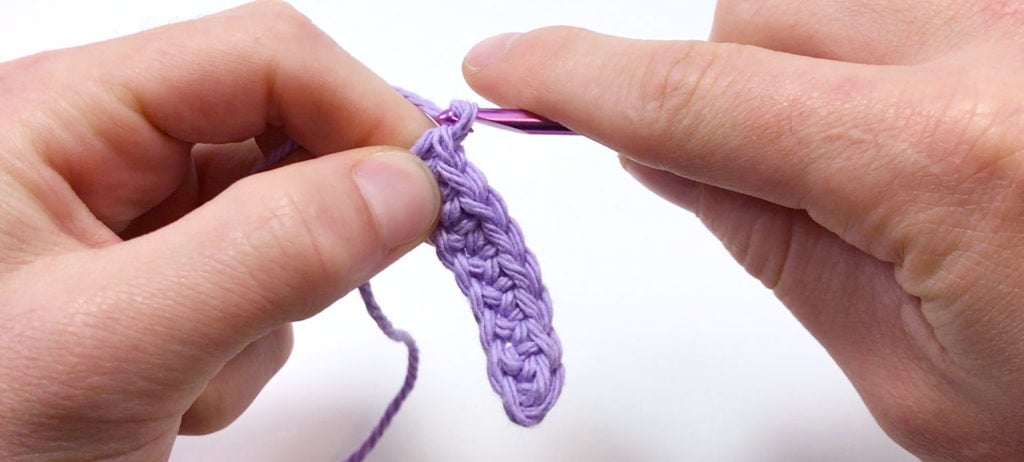
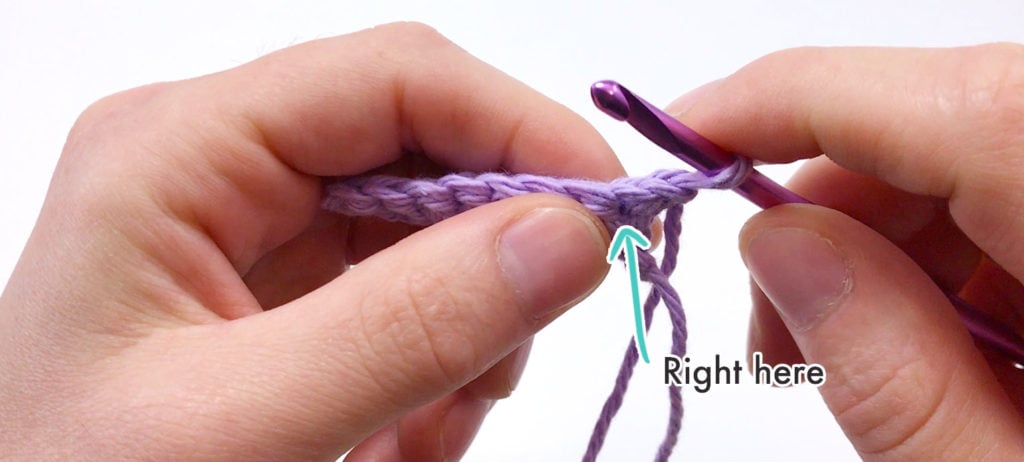
Step 1: Once you have 9 nice-looking chains, you’ll skip the first chain from the hook and put your hook into the top loop of the next chain over.
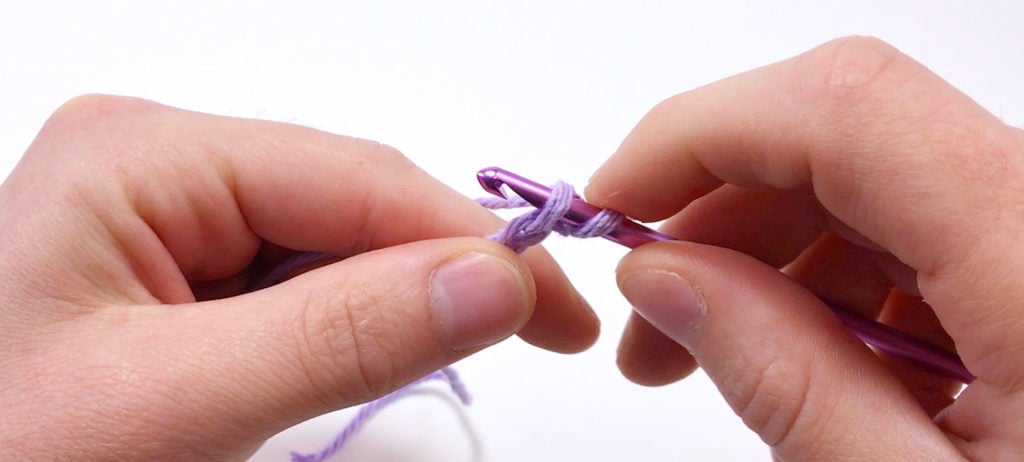
Step 2: Next you yarn over
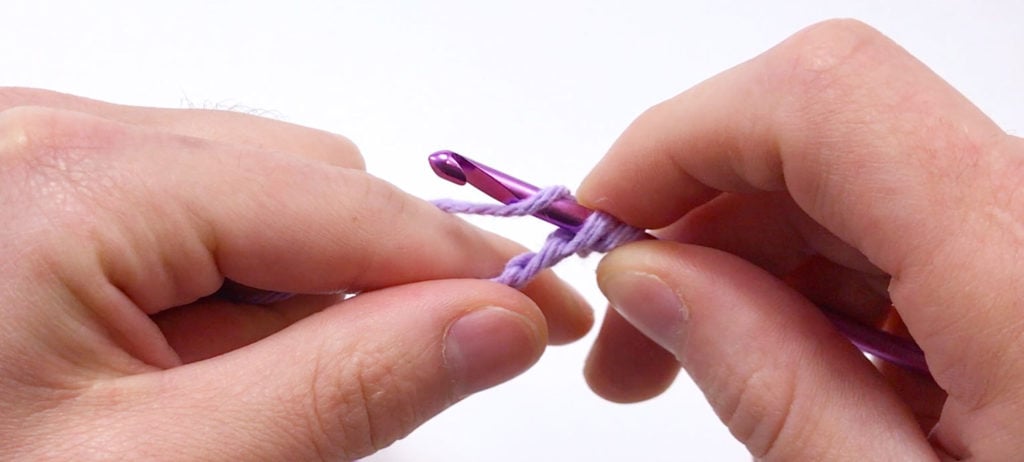
Step 3: Pull that loop through the hole.
Try to scoop the yarn with the hook. This might be easier than just pulling it through.
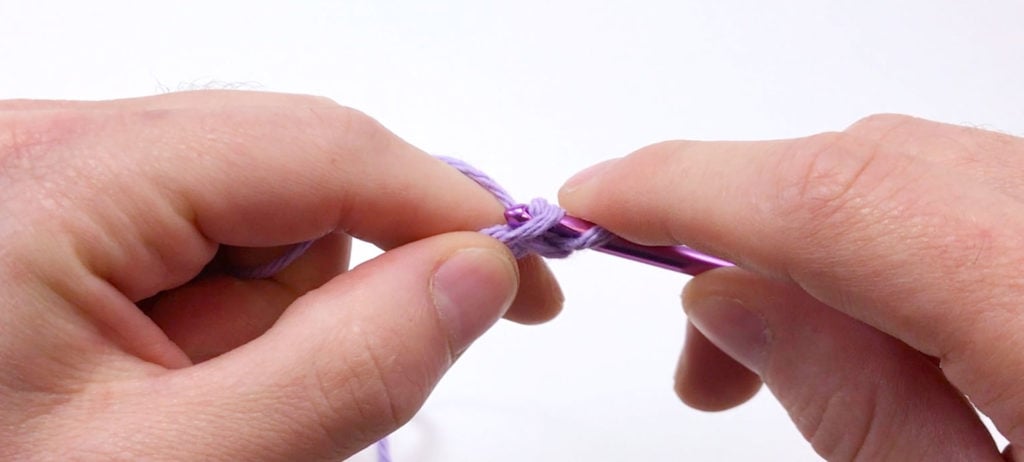
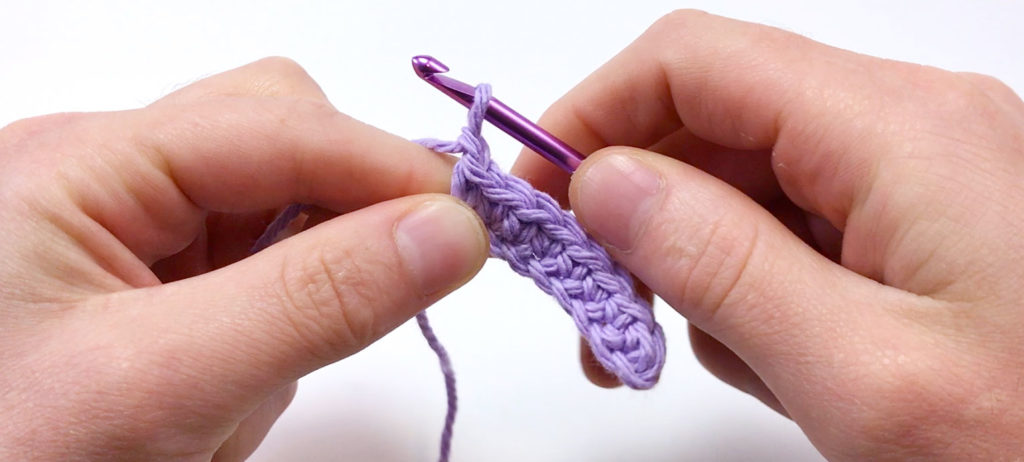
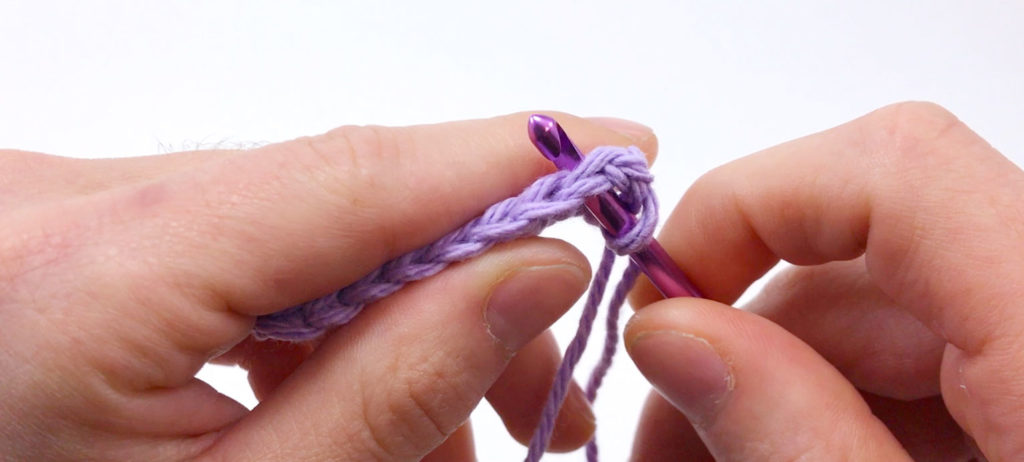
Step 4: Then yarn over again.
Step 5: And pull that loop through the rest of the loops on the hook.
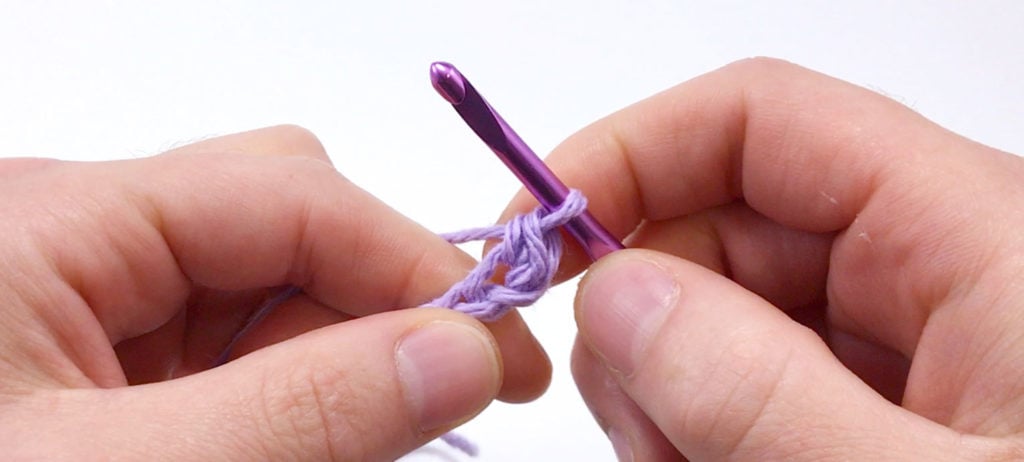
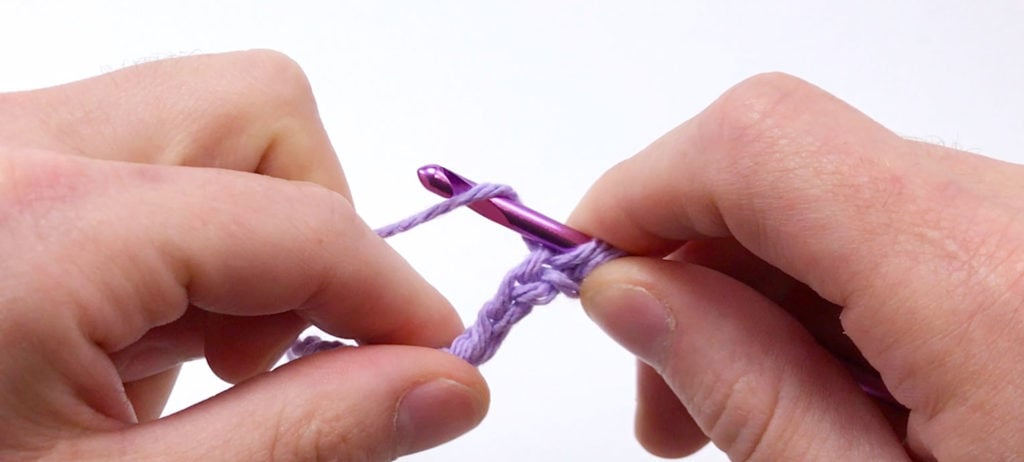
Repeat: Now to keep going! You just need to repeat steps 1 – 5 above into the next chain to the left.
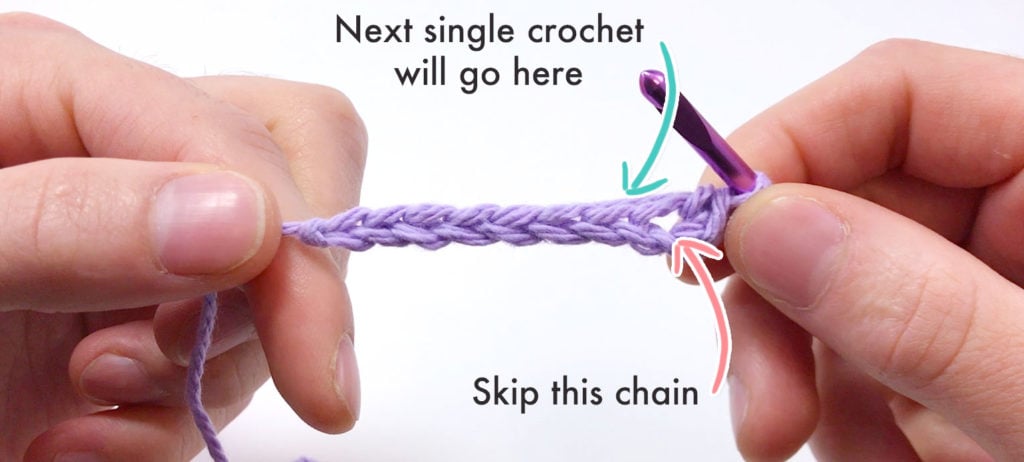
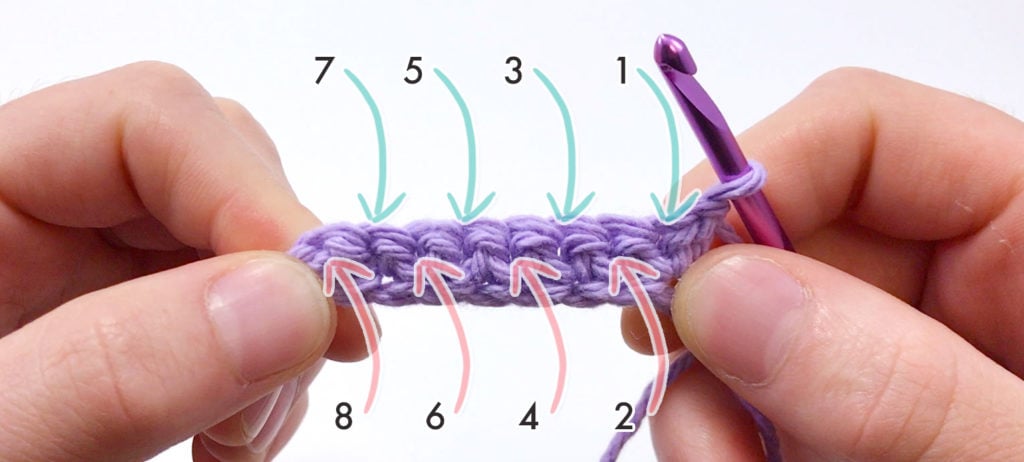
At the end of the row, when you get through all the chain stitches (8), all you need to do is chain one and turn the whole thing around.
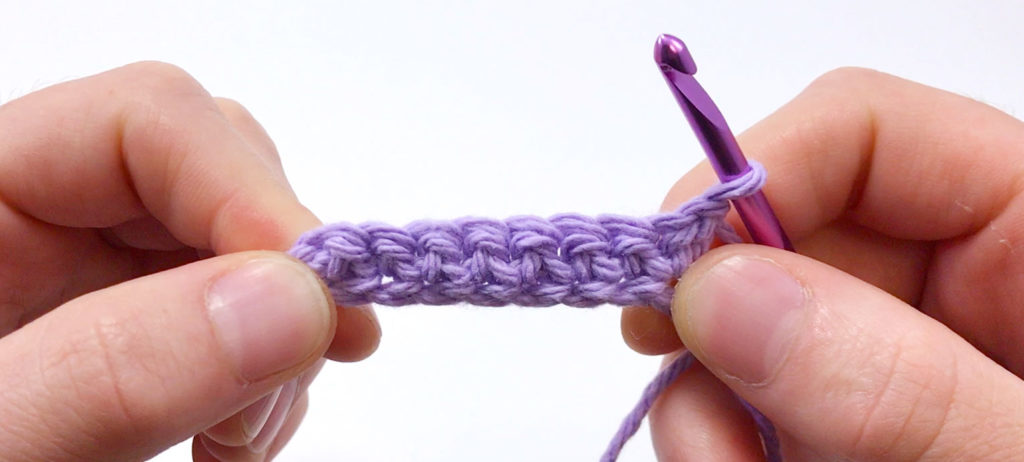
Row 2: This is pretty simple; you’ll be doing the same thing as you did before, but instead of putting your hook in the holes of the chains…
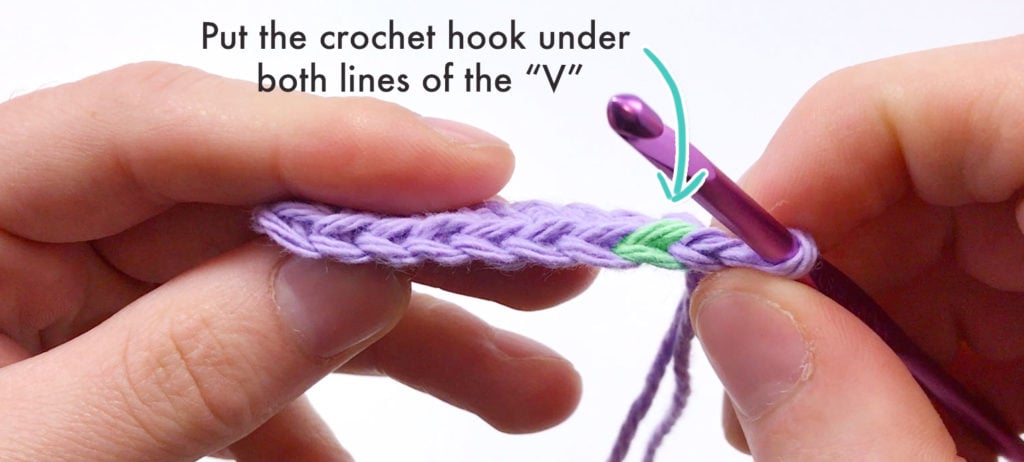
You’ll be putting them under these two, and into this hole here.
Make sure to skip that first chain you made though, the one you made at the end of your first row.
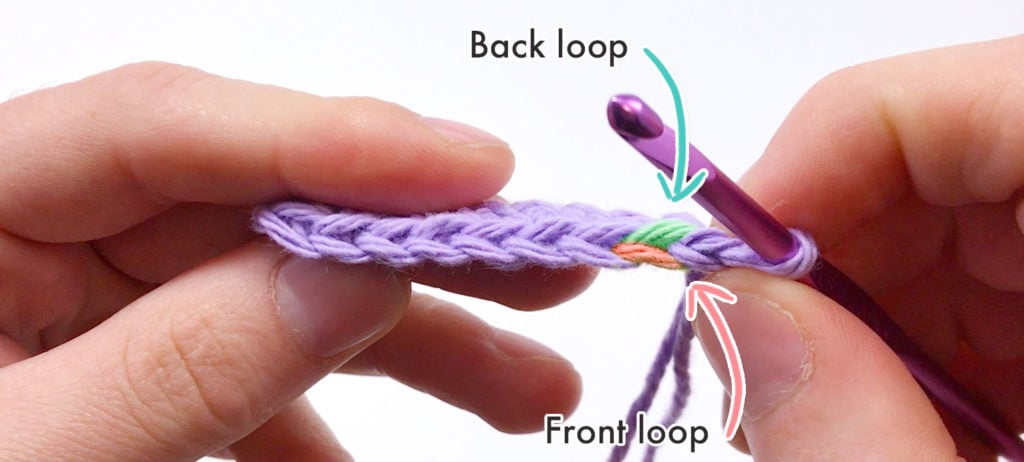
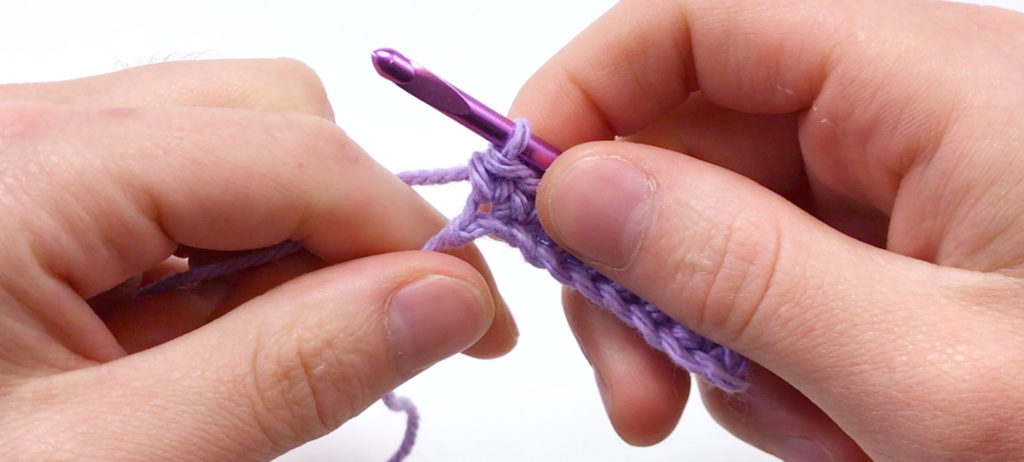
Make sure you go under both of these loops for now, but just so you know, this is part furthest from you is the back loop,
and the one closest to you is the front loop.
You can use these for other stitches and techniques later like invisible decreases, but for now, you should work into both these loops at the same time.
I think I’m working too tight or loose…
There’s a decent chance you’ll be single crocheting too tight or too loose when you first start out. You’ll know because you either won’t be able to get your hook into the stitch in the start (working too tight) or the piece will resemble more of a fishing net then what you were trying to make (too loose). I think it’s better to work too loose than too tight because if you’re working too loose you can at least still get the hook into the stitches, so try loosening your grip with your hand that’s grasping the yarn.
This is not really something I can necessarily teach you how to do better or worse, but it will come with time and practice.
Next Pattern
Other Patterns You Might Like
31 thoughts on “Chapter 3: The Single Crochet”
Leave a Comment
You must be logged in to post a comment.
Thank you for keeping things simple and easier to understand! I’ve been wanting to get into arigarumi for ages I finally have the confidence to start trying!!!
Sooo good
i love these lessons keep teaching